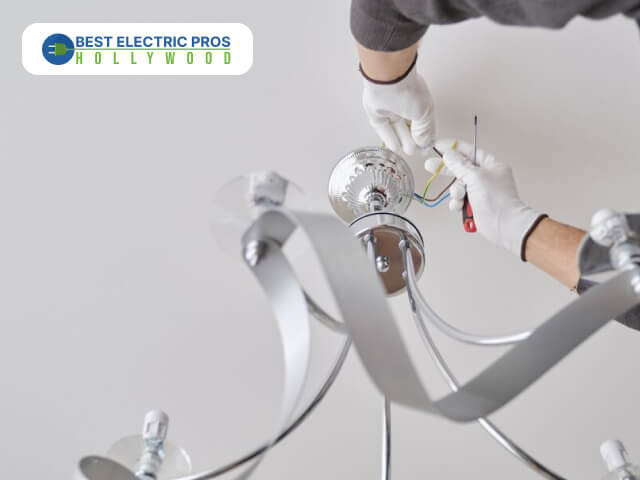
Putting up a brand-new light fixture is a quick and easy way to make any space look more vibrant and inviting. There is a plethora of tempting light fixtures available in lighting catalogs and display windows, and it sometimes gets hard not to give in. Some fixtures come with a seemingly endless bag of parts, making them seem too complicated to install, but the wiring is easy enough for a novice. However, a fatal shock or fire could ensue from sloppy installation. For this reason, it may be prudent to consult a professional electrician to reduce the risk of damage and guarantee correct lighting installation. If you are handy with electrical wiring, you may try hanging the lights yourself. Read on for some pointers from Best Electric Pros Hollywood on what you need and how to properly install a chandelier or other elaborate light fixture.
Chandelier lighting installation is simpler than it looks. Taking accurate measurements is the first step in ensuring a successful and secure fixture installation. Start by finding out how high your ceiling is from the ground up and how wide it is from wall to wall. After taking these dimensions, you may figure out how much string or chain will be required for hanging.
What You Will Need:
- A measuring tape
- Wire-cutting pliers/snips
- A chandelier-hanging kit with two chains
- Hammer
- Screwdriver
- A ceiling joist system (optional)
Step #1: Prepare the Chandelier Light for Installation
- There must be sufficient support in the beam or strut from which you plan to attach the chandelier. In most cases, the strut can support 50 lb. before a second stud is required for attachment.
Step #2: Detach the Old Lighting Fixture if There Are Any
- Power down the light fixtures on the main circuit breaker. To lower the dome-shaped canopy, undo the attaching nut(s). Next, remove the fixture by removing the screws holding the crossbar to the junction box.
Step #3: Inspect the Connection Wirings
- Take a look at the old chandelier or light fixture to see where the cables are located. If there are more than two wires, they should be marked with color, surface insulation, and ridge labeling. In most cases, you can confirm the correct placement of each wire by referring to the accompanying diagram. If not, use different colored tapes to distinguish between the wires.
Step #4: Setup the Electrical Box
- An integral part of installing a chandelier is taking out the electrical box, often known as the mounting box or junction box. Ensure the electrical box is screwed firmly into the ceiling. White and black wires will be visible; check both for wear and tear. Investigate for fraying edges. If you spot any problems, use a wire stripper to remove the insulation from each wire.
Please note that if the chandeliers weigh over 50 lb., they may need more than the electrical box for support. Ensure to follow the guidelines specified in the electrical box. When installing a large chandelier, it is critical to use a sturdy mounting bracket.
Step #5: Assemble the Chandelier
- Chandelier parts may arrive preassembled, but if they don’t, assembly is simple once you get the hang of the manufacturer’s guidelines. Be sure to dust off the chandelier and wipe it off while you’re at it.
Step #6: Chandelier Assembly and Chain Length Measuring
- If the chandelier’s parts are not pre-assembled, do so yourself by following the manufacturer’s guidelines. Next, measure the chandelier chains, which should be three inches per foot of ceiling height. We recommend using a 4-inch chain with an extra chain link for each hanging loop.
Step #7: Affix the Chandelier to the Ceiling Securely
- You can use either a ceiling-mounted or wall-mounted electrical box to hang a chandelier. For in-depth how-to’s, please refer to the manufacturer’s manual.
Step #8: Adjoin the Black and White Wirings
- Link the end of the black electrical supply wire to the black chandelier wire. Connect the chandelier wires by twisting the wire nuts, ensuring a snug fit. Next, put the white wires from the fixture and the power source into the junction box. Cover everything with the canopy or ornamental plate to hide the extra wires.
Step #9: Complete the Installation with Light Bulbs
- Always double-check your bulbs’ wattage against your fixture’s recommended wattage to ensure a successful installation.
Which Size of Chandelier Lighting Do You Need?

Remember that the chandelier’s style and visual weight will also play a role in determining the appropriate size. A lighting fixture with heavy visual weight can be narrower, while one with less visual weight can be wider.
You may easily calculate the appropriate chandelier size by adding the room’s dimensions in feet and then converting the sum to inches. The inches-long result should be equal to the fixture’s diameter. Please see the following useful tips for an extra guide:
- Room size below 10′ x 10′: 17″ to 20″ light fixtures
- Room size above 10′ x 10′ in size: 22″ to 27″ light fixtures
- Room size over 12′ x 12′ in size: 24″ to 32″ light fixtures
Standard Height Recommendation
Chandeliers come in so many sizes, shapes, and styles that finding the right one can be challenging. When selecting a dining room chandelier, the table size is an important consideration if you want to hang it above.
Most chandeliers are hung at the height of 30 to 36 inches above the table in the dining room. For higher ceilings, elevate the chandelier by 3 inches per foot of additional ceiling height.
Bottomline, the room and table size are the two factors that play a role in determining the best chandelier size. You may also consider the light projection range for better lighting at certain times of the day.
If you want to learn more about lighting installation or any other electrical-related tasks, feel free to check out other blogs from Best Electric Pros Hollywood.

